Creating package repositories in Space
As a small company or team, building online services, you usually do not want to run your own application for storing artifacts like .jar files or docker images. This is something that should be co-located to source code repositories and should just be available. Besides the fact that there are some open source solutions, setting up and running such a storage system takes time and resources.
JetBrains Space comes into play here very handy. Package repositories, aka Packages are part of a project in Space. So you can configure dedicated package repositories for each project. Currently it is possible to use the following package repository types:
- Container registry: for Docker images, OCI images and Helm chart
- Maven repository: for .jar, .klib, pom, .war files
- NuGet Feed: for NuGet packages
- npm registry: for npm package
Let’s assume we are building a Spring Boot based backend application. Since the deployment artifact of such an application is a .jar file, we want to push it to a maven repository.
Creating a maven package repository and publishing a .jar file
The first thing you need to do is to open JetBrains Space and navigate to your project. On the left you will see the “Packages” menu, where you will see an empty page from where you can create a new repository.
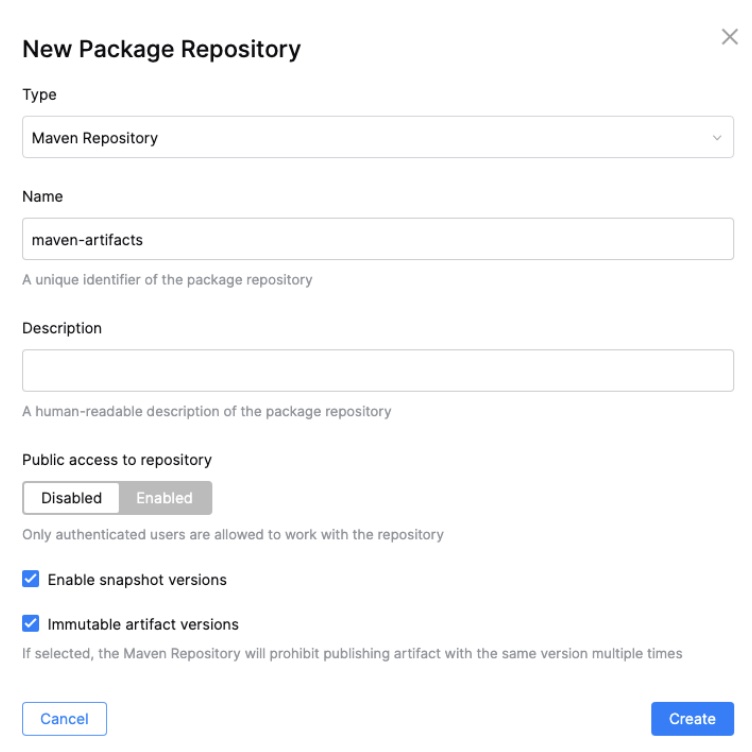
Then select “Maven Repository” from the list of types.

Afterwards, a good name needs to be set as well as some other settings:
Now the maven repository is ready to use. In order to publish artifacts from your local machine, a few configs have to be set. Therefore the “Get started” button opens a popup and provides the settings you need to configure.
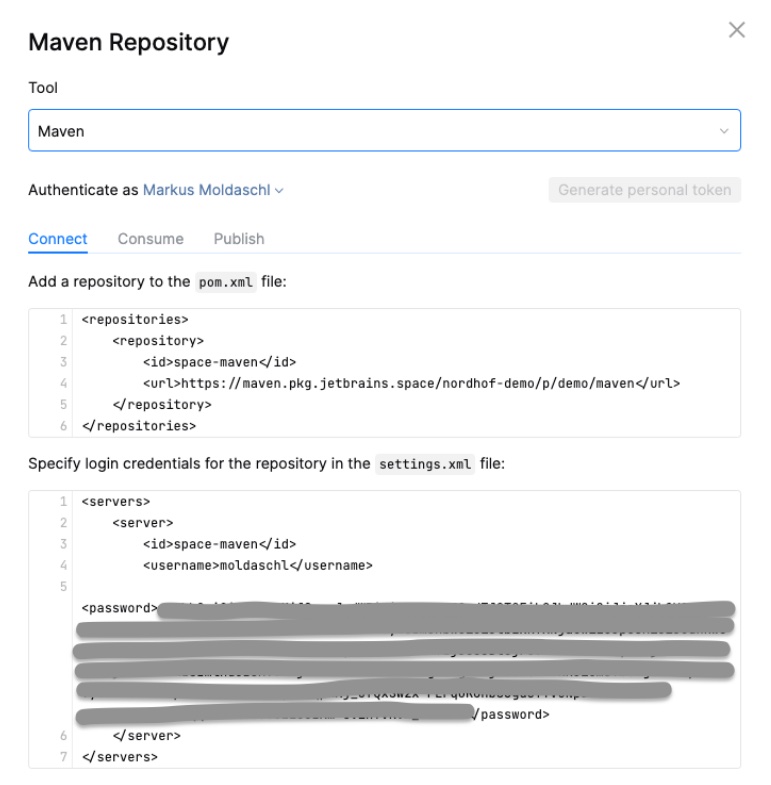
The access token, which I obfuscated in the screenshot (I’ve done my best ;-)) can be easily added by pushing the “Generate personal token” button. This is also quite handy, because otherwise you would have to go to your settings, find the page for “Access tokens”, create a new access token and copy it from there.
If you want to publish artifacts from your localhost, go to the “Publish” section and copy the <distributionManagement> settings.
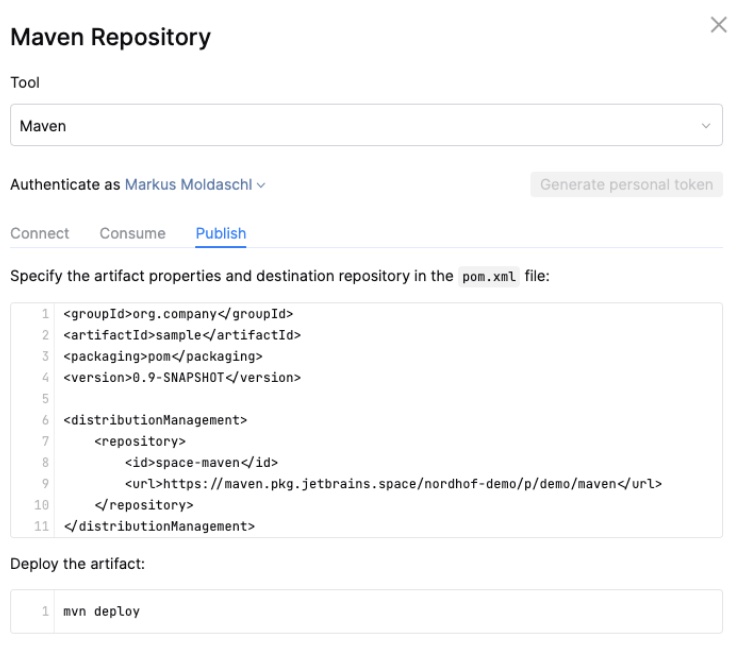
As soon as this is done, you can run
mvn deploy
and the artifact will be published successfully.

If you publish a library that is supposed to be used in other applications, you just need to configure the repository as in the “Connect” section and define the dependency. That’s it.
Creating a container registry and publishing a docker image
At some point you usually want to create a Docker image for your application. As soon as you have the Dockerfile in place, it’s time to create a container registry. Via the “Packages” page, use the “New repository” button to create a container registry.

The settings are quite equal to the ones in our maven repository and again, as soon as you created the registry, the “Get started” button helps you with your local configuration.
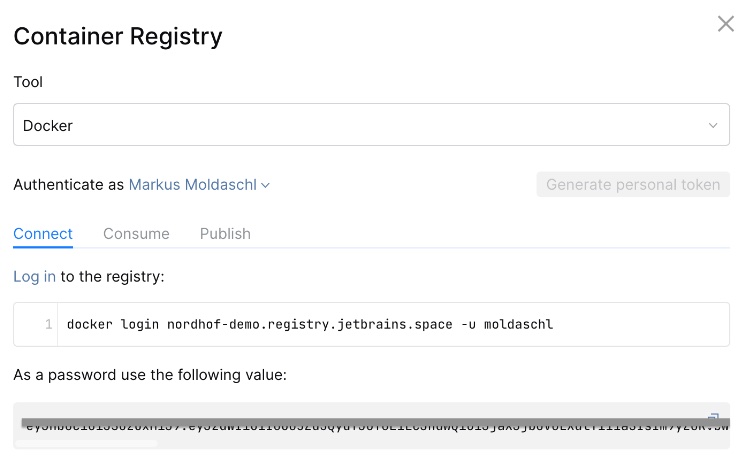
Depending on the tool you select (Docker or Helm), you see what you must do to connect, consume or publish artifacts from your local machine.
Applying this to our backend application, we need to
docker login nordhof-demo.registry.jetbrains.space -u moldaschl -p $PW_DOCKER_NORDHOF_DEMO
in order to connect to our newly created container registry. Then we build the image:
docker build -t nordhof-demo.registry.jetbrains.space/p/demo/containers/hello-world-backend:latest .
and push it to our registry:
docker push nordhof-demo.registry.jetbrains.space/p/demo/containers/hello-world-backend:latest
Having pushed everything, our package repositories look like
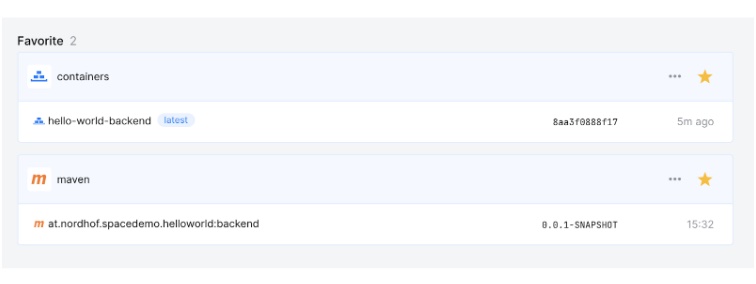
So we have our artifacts ready for further processing.
Conclusion
As a Java backend engineer I was able to set up a maven repository and docker registry where my team can publish and consume artifacts. With JetBrains Space this is really easy and it works like a charm. Having the chance to easily set up such services for software engineers makes your team autonomous which is an essential characteristic of high performing teams.